
Discover the joy of crafting unique and personalized homemade ornaments that bring warmth and charm to your holiday season. Whether you’re a seasoned crafter or new to the art, creating homemade ornaments offers a rewarding way to express creativity and thoughtfulness. From simple salt dough ornaments to customized photo keepsakes, there’s something for everyone to enjoy. Learn how to make easy ornaments at home, explore unique ideas for Christmas decorations, and discover the secrets to creating lasting memories through these heartfelt crafts. This guide will walk you through everything you need to know, from selecting the right materials to customizing your creations, ensuring your homemade ornaments become cherished gifts year after year.
Key Takeaways
– Crafting Perfect Homemade Ornaments: Discover easy, creative ways to fill and decorate DIY ornaments with eco-friendly materials like sand, rice, or coffee grounds for unique textures and scents.
– Simple DIY Ornament Ideas: Create festive decorations with paper plate snowflakes, button ornaments, or coffee filter art, perfect for holiday displays.
– Quick Crafting Projects: Transform recycled items like socks or paper bags into charming ornaments with minimal supplies and no special skills required.
– Versatile Holiday Decorations: Personalize ornaments with seasonal themes, ranging from spring butterflies to winter snowflakes, for a customized festive look.
How Do You Make Easy Ornaments At Home?
Creating simple yet beautiful ornaments can be a fun and rewarding craft project. Whether you’re looking for something quick or something more elaborate, here’s a guide to making easy ornaments at home:
Materials Needed
- Cardboard or thick paper
- Scissors
- Glue sticks or hot glue gun
- Premium markers or paint
- Beads, sequins, or decorative elements
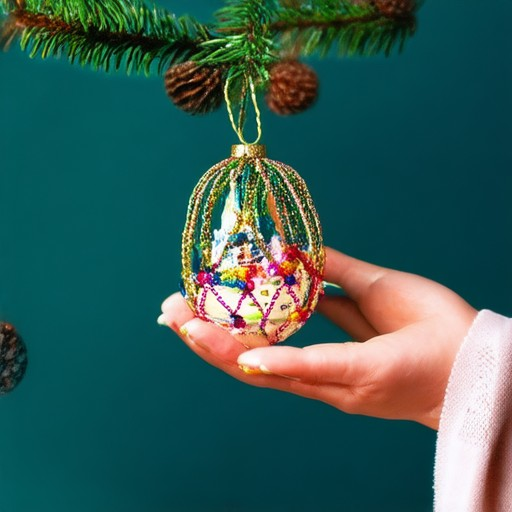
- Optional: Gold foil or glitter for added sparkle
Step-by-Step Instructions
- Gather Your Materials: Lay out all your materials on a clean workspace. Make sure you have everything you need before starting.
- Create the Base Shape: Cut out a shape from your cardboard or paper. Common shapes include circles, squares, hearts, or stars. You can also freehand a design.
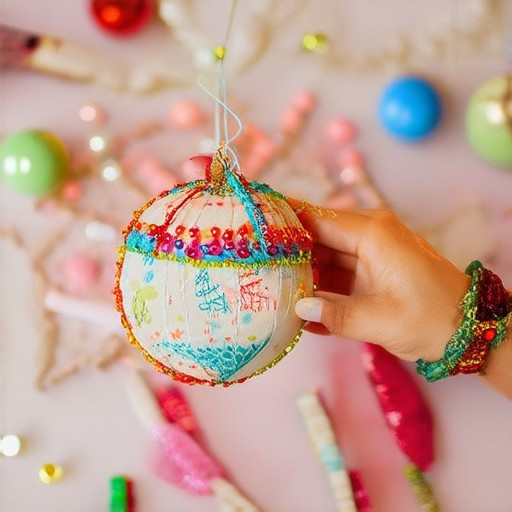
- Decorate the Base: Use markers or paint to add colors and patterns to your ornament base. Add details like snowflakes, trees, or festive scenes.
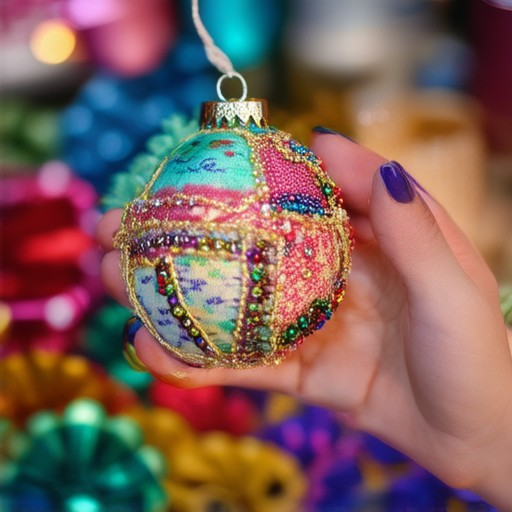
- Add Decorative Elements: Attach beads, sequins, or other embellishments to your ornament. Glue them securely in place for a lasting decoration.
- Seal and Finish: If needed, seal the ornament with a clear coat of varnish or spray paint to protect it and make it durable. Allow it to dry completely before hanging.
Tips for Success
- Keep your scissors sharp for clean cuts.
- Work on a flat surface to ensure accuracy.
- Test your glue strength by pressing firmly on glued areas.
- Add personal touches to make your ornaments unique.
Variations
You can customize your ornaments by:
- Using different colors and patterns
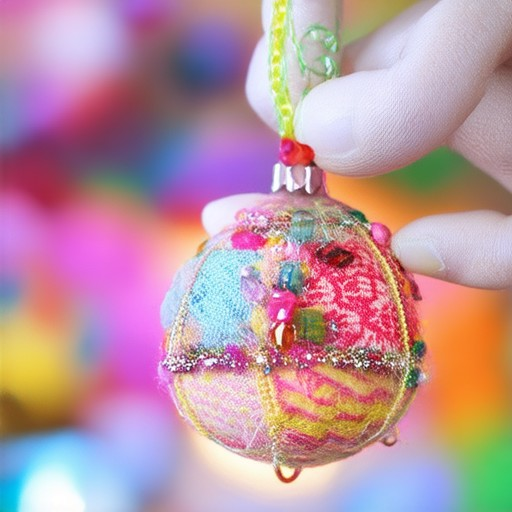
- Incorporating fabrics or feathers
- Making 3D shapes with additional materials
- Adding holiday-themed stamps or stencils
With these simple steps and tips, you’ll be able to create charming ornaments that brighten your home or serve as thoughtful gifts. Happy crafting!
How Long Do Salt Dough Ornaments Last?
Salt dough ornaments are known for their durability, but their longevity depends on several factors:
- Material Composition : Salt dough ornaments are typically made with a mixture of salt, flour, and water. The salt acts as a natural preservative, helping to resist mold and bacteria growth.
- Storage Conditions :
- Dry Environment : Keeping ornaments in a dry place, such as a closet, helps prevent moisture damage.
- Humid Areas : Storing in areas with high humidity can lead to mold growth, shortening the lifespan.
- Environmental Factors :
- Temperature : Excessive heat can cause the dough to harden or crack.
- Sunlight : Prolonged exposure to sunlight can fade colors and may cause the dough to become brittle.
- Display Location : Displaying ornaments in areas with less light and moisture, such as shelves rather than windows, can preserve their condition.
- Protective Measures : Applying a food-safe sealant can enhance durability by preventing moisture absorption and cracks.
- Thickness : thicker ornaments tend to last longer than thinner ones, as they are less prone to breaking.
- Handling : Rough handling or frequent movement can reduce the lifespan of ornaments.
By considering these factors, you can enjoy your salt dough ornaments for many years.
Sealing Homemade Ornaments
To preserve the quality and longevity of your homemade ornaments, sealing them is essential. Here are the recommended methods and materials:
- Mod Podge: A popular choice for sealing ornaments, Mod Podge provides a durable finish. It is available in matte or glossy finishes, depending on your preference. Apply evenly with a soft brush for a smooth coverage.
- Polyurethane Sealant: Ideal for protecting against moisture, this sealant dries quickly and offers a long-lasting finish. It is suitable for various ornament types, including those with intricate designs.
- Clear Acrylic Sealer: Offers a high-gloss finish and is easy to apply. It is food-safe, making it ideal for ornaments that may come into contact with food during display.
- Spray Sealants: These can be applied evenly and are quick-drying. Ensure they are safe for use on your specific ornament materials to avoid damaging finishes or designs.
When applying any sealant, ensure the surface is dry and clean. Use a light touch with a soft brush or applicator to avoid unevenness or damage to delicate surfaces. Consider testing a small area first to check for compatibility.
DIY Ornaments Filling Ideas
Here are several creative ways to fill your DIY ornaments:
- Sand: Use fine sand for a smooth, natural texture. Consider mixing in small beads or glitter for added visual interest.
- Rice: Fill the ornament with rice for a lightweight, eco-friendly option. It creates a subtle, natural aesthetic.
- Coffee Grounds: Add coffee grounds for a unique, earthy scent and texture. They are biodegradable and add a grounding effect.
- Small Stones or Shells: Incorporate small stones or sea shells for a rustic, natural look. Pair with herbs for extra fragrance.
- Dried Flowers: Use dried flowers or herbs like lavender or rosemary for a fragrant and visually appealing option. They add a touch of nature to your ornaments.
- Herbs: Infuse your ornaments with aromatic herbs such as lavender or rosemary to create a calming atmosphere. Perfect for relaxation.
- Small Plastic Pieces or Buttons: Add texture with tiny plastic shapes, beads, or buttons for a playful, interactive design.
- Nuts and Bolts: Combine nuts and bolts for a quirky, industrial-style look. This option adds a unique mechanical aesthetic.
Simple Homemade Ornament Ideas
Creating homemade ornaments can be a fun and rewarding activity. Here are some easy-to-follow ideas for making simple yet beautiful decorations:
- 1. Paper Plate Snowflakes Transform paper plates into snowflake ornaments by cutting out a central hole and folding edges to create a snowflake shape. Paint or decorate with glitter for a festive touch.
- 2. Button Ornaments String together buttons of different colors and shapes to create a colorful necklace-like ornament. Add a loop at the end for hanging.
- 3. Coffee Filter Art Use coffee filters as a canvas to create abstract paintings. Let the filters dry and then string them together to make a decorative mobile or ornament set.
- 4. Sock Ornaments Turn old socks into charming ornaments by cutting small shapes from the tops and stitching them together. Add beads or buttons for extra flair.
- 5. Candle Holder Ornaments Melt beeswax or candle wax and pour it into silicon molds to create small orb-shaped ornaments. Allow them to cool and harden before displaying.
- 6. Paper Chain Ornaments Make chains using paper strips or ribbon and attach small decorative elements like stars or circles to each link. String them together to form a garland or individual ornaments.
- 7. Cookie Cutter Ornaments Use cookie cutters to create shapes out of cardboard or foam. Paint them and add a loop for hanging. Great for personalized holiday decorations.
- 8. Seasonal Themed Ornaments Create ornaments inspired by different seasons. For example, make a spring-themed butterfly, summer-themed beach scene, autumn leaf, or winter snowflake.
Simplest Homemade Ornament Ideas
Looking for easy DIY ornament ideas? Here are some simple and creative ways to make your own decorations:
- 1. Recycled Sock Ornaments
- 2. Button Ornaments
- 3. Paper Bag Ornaments
- 4. Coffee Filter Ornaments
- 5. Candle Holder Ornaments
Transform old socks into cute ornaments by cutting out the toes and stuffing them with rice or cotton balls. Sew the ends together and decorate with ribbons or beads.
Thread buttons onto a piece of string or ribbon to create a simple necklace-like ornament. Add a loop at the end for hanging and finish with a bow.
Take a small paper bag, fold it to create a cone shape, and glue it closed. Paint or draw designs on the outside, then cut a small circle from the bottom for a hanger.
Form coffee filters into cones and secure them with a rubber band. Paint or wrap them with fabric, then add a bow or star decoration for a festive look.
Use a small glass container or a hollowed-out orange to hold candles. Decorate with paints, glitter, or beads for a charming centerpiece.
These simple ideas require minimal supplies and can be personalized to suit any taste. Get inspired and start crafting!
For more DIY ornament ideas, check out our DIY Projects collection on PravyloProject.com.
Don’t forget to share your creations with us—we’d love to see your homemade ornaments!


0 Comments